
Easy Infrastructure Hack: Solving Uneven Load Distribution in Google Cloud for RTMP Ingestion
February 15, 2025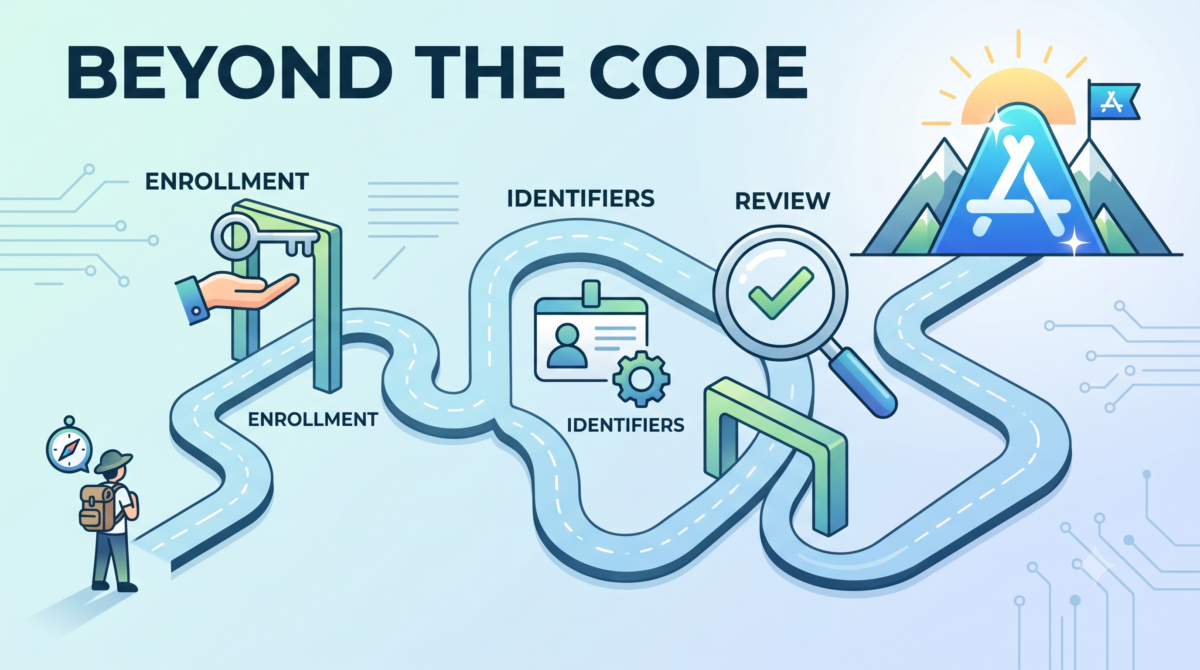
I recently took an app through its first iOS App Store submission. The app itself was done — the hard part turned out to be everything around it: enrolling in the Apple Developer Program in the first place, Apple’s account and identifier setup, App Store Connect’s own procedural landmines, and two real rejections that forced me to change how the app behaved, not just how it was configured. Here’s what that process actually involved, starting from before I’d written a single line of submission-related code.
Enrolling in the Apple Developer Program as an Indonesian company (PT)
If you already have an established Indonesian company (a PT) and think enrollment will be a quick formality because your business is legitimate and well-documented, budget for it to take weeks anyway. None of what follows was because my paperwork was in bad shape — it was the process itself.
The D-U-N-S number step, in my specific case, moved quickly. Apple requires organizations to have a D-U-N-S number before enrolling, and you can request one directly from the Apple Developer site, which routes you to your country’s local D&B branch — D&B Indonesia, in my case. They responded within 24 hours asking for supporting documents to verify the company’s legal existence: the deed of establishment (Akta Pendirian), company tax ID (NPWP Badan), business registration number (NIB Badan), a printed copy of the relevant ministerial decree (Surat Keputusan Menteri), a photo of the office/branch location, and data on outstanding receivables (data piutang). Once D&B Indonesia confirmed everything, the D-U-N-S number arrived by email within that timeframe for me — but this is one data point, not a guarantee: D&B’s review depends on your specific documents and branch, and other applicants have reported it taking considerably longer. Don’t plan your timeline around mine.
Enrolling through the Apple Developer website is where it went wrong. I completed the enrollment form online through apple developer website, everything got verified, and Apple asked for the developer program payment. I paid by credit card, received an order acknowledgment email saying it would process in about two business days — and then heard nothing for three full weeks. No developer account, no follow-up, nothing. I opened a support ticket, and after investigation, Apple’s support team told me there’s a known issue with payments when enrolling through the web, and insisted I restart the enrollment using the Apple Developer app on macOS or iOS instead, since that path doesn’t hit the same problem. No further explanation of what the actual problem was.
So I re-enrolled through the Apple Developer app — and hit a second wall at identity verification. Neither an Indonesian national ID (KTP) nor a driving license was accepted to verify identity, on either a MacBook Pro or an iPhone. I opened another support ticket and specifically requested a phone call this time. The advice I got was generic — check your lighting, make sure your ID is clearly visible in frame — and repeating it made no difference across multiple attempts on both devices. After enough failed attempts to be genuinely frustrating, I tried an Indonesian passport instead (mine happened to still be valid), and that went through without issue. If you’re enrolling from Indonesia: skip straight to your passport for identity verification and save yourself the loop.
Business verification came next, and it has its own translation trap. Enrolling as an organization means proving both that the company is real and that you’re authorized to act for it. At this stage, Apple emailed asking me to upload a government-issued photo ID, employment verification, and the company’s Deed of Establishment (Akta Pendirian) and Business Registration Number (NIB) — through a secure upload link, since Apple couldn’t otherwise verify my identity and my association with the enrolling entity.
One detail from that email is worth knowing up front: Apple explicitly lists which languages your documents can already be in without needing translation at all — English, Spanish, French, Italian, German, Brazilian Portuguese, Chinese, Japanese, and Korean. Only if your documents aren’t in one of those does it ask for a solicitor-certified English translation. Indonesian isn’t on that list, so every Indonesian-language document needs a certified translation — but it’s worth checking this list for your own country before assuming translation is required, since it may not be depending on your local language.
None of my documents were in a supported language, so every one of them needed a certified translation into English (usually billed per page) — a real problem for the deed of establishment (Akta Pendirian) specifically, since it can easily run 30+ pages. I assumed that the ministerial decree served as a summary of the deed of establishment, so I took a chance and submitted only the decree instead of the full deed. Thus, I had only the NIB and the Surat Keputusan Kementerian translated — four pages total — and that combination was accepted. The last document is proof of employment: As a founder, my name was already on the Surat Keputusan Kementrian itself, so i did not submit this document. Worth checking whether the same applies in your case before paying to translate an entire deed of establishment.
Only after business verification cleared did I pay again — half expecting the same three-week silence as the first attempt. This time the developer account was issued instantly, immediately after the payment confirmed.
Takeaway for anyone enrolling from Indonesia specifically: start the D-U-N-S request as early as possible regardless of how long you expect it to take, since it’s a prerequisite for everything after it; consider enrolling through the Apple Developer app rather than the website, since the website path is where my payment issue happened; if a KTP or driving license gets rejected for identity verification, try a passport before assuming the process itself is broken; and before paying a solicitor to translate your full Akta Pendirian, ask what the actual minimum accepted document set is — a shorter combination of documents may be accepted instead.
What to have ready before you start
Based on what the process actually asked for, here’s what’s worth preparing in advance rather than scrambling for mid-process:
For the D-U-N-S number request:
- Deed of establishment (Akta Pendirian)
- Company tax ID (NPWP Badan)
- Business registration number (NIB Badan)
- A printed copy of the relevant ministerial decree (Surat Keputusan Menteri)
- A photo of your office/branch location
- Data piutang (outstanding receivables data)
- Confirm the legal company name, address, and details you submit match exactly across all of the above — mismatches are a common source of delay in D&B verification generally
For enrolling itself:
- A Mac or iPhone with the Apple Developer app installed, as your primary path — DO NOT enroll from the website!
- A valid credit card for the enrollment fee
- Your D-U-N-S number in hand before you start the enrollment form
For identity verification:
- A valid passport ready from the start, even if you already have a KTP or driver’s license, rather than waiting until other IDs fail. The passport verification went smoothly for me. However, if your circumstances prevent you from using one, you may need to contact Apple Support for manual verification. And yes, definitely call their support rather than emailing.
- A well-lit space to do the verification photo/video step
For business/organization verification:
- Certified (solicitor/sworn) translations of your NIB and Surat Keputusan Menteri into English
- Your Akta Pendirian on hand, but hold off on paying for a full certified translation of it until Apple’s support/verification team confirms it’s actually required for your case
- Clarity on who in the company will be the enrolling Account Holder, and confirmation that their name appears in the company’s legal documents (e.g. the Akta Pendirian) to establish authorization
General:
- A realistic timeline — plan for multiple weeks end-to-end, not days, even if individual steps go faster
- A support ticket trail if anything stalls — don’t just keep retrying the same step silently; ask for phone support specifically if a verification step keeps failing for unclear reasons
Registering your app’s identifiers is its own project
Once the developer account itself was sorted, the next layer was registering the app’s actual identifiers. Before you can submit anything, you need an explicit App ID registered under the right team, and it needs to happen deliberately.
I ran into a specific trap worth knowing about: if any build ever runs with automatic code signing turned on, Xcode will silently register your bundle identifier with whatever Apple account happens to be active at that moment — which might be a personal, free developer account rather than your company’s paid one. Free-tier (“Personal Team”) registrations don’t show up anywhere in Apple’s developer web portal, so there’s no way to notice this happened except by testing which account can actually sign successfully. Once an identifier is claimed this way, a paid team can’t register the same string — you’re stuck either asking Apple Developer Support to release it (which can take days) or picking a new identifier and registering it properly from the start.
Certain capabilities compound this. Push Notifications specifically cannot be enabled on a wildcard App ID at all — it requires an explicit identifier, registered for your exact bundle string, with the capability checked at registration time. And getting push notifications to actually deliver requires a second, entirely separate step: generating an APNs authentication key from the developer portal and uploading it to your push provider. Skipping either half gives you a token that is issued successfully and then never receives anything, with no error to tell you why.
Takeaway: treat identifier and capability registration as a deliberate, first-class step of shipping to iOS — not something that happens automatically as a side effect of building the app.
App Store Connect has its own procedural gotchas, before review even starts
- Your public “Company Name” — the Seller name shown on every app you publish — can only be set once, the first time you create an app under a new team, and isn’t self-service changeable afterward. Decide it deliberately before your first submission.
- App names are globally unique across the entire App Store, not just within your own account. Don’t assume your first choice is available.
- The “Paid Applications Agreement” is easy to get funneled into unnecessarily. It comes with a formal tax residency declaration, and it’s only actually required if you sell something through Apple’s own payment system — a paid download or an in-app purchase. If your app is free to download and any payment happens through your own, independent payment processing for a real-world good or service, you don’t need this agreement at all, regardless of what App Store Connect’s flow nudges you toward.
- A handful of configuration warnings show up on almost every real submission, and the fix usually isn’t “add the string Apple is asking for” — it’s understanding what triggered the request:
- A location “always” permission warning can be triggered by a dependency’s compiled code referencing that capability, even if your own app only ever asks for foreground/while-in-use access. If you don’t actually use background location, the right fix is removing the unnecessary permission declaration entirely, not adding more.
- If your app supports tablets at all, Apple requires all four screen orientations to be declared for multitasking support — even if you only care about one orientation on phones. This is a separate declaration from your phone orientation settings, easy to miss.
- Apple’s export compliance questionnaire is really asking whether your code implements or calls into an encryption algorithm directly. Using standard HTTPS for all network traffic through the OS’s built-in networking doesn’t count — that’s the most common case, and it qualifies as exempt.
The two rejections, and what they were actually about
Both rejections I got shared the same root cause, even though they landed under completely different guideline numbers: I had designed a specific flow (login, and browsing) around what was convenient for my own product decisions, without ever checking it against how Apple actually expects a first-time or account-less user to experience the app. Neither issue was a technical bug or a configuration mistake — both were design decisions that had never been evaluated against App Review Guidelines at all until a reviewer did it for me.
Guideline 4.2.3(i) — Minimum Functionality (see Apple’s App Review Guidelines, section 4.2). My account login relied on a third-party messaging app to deliver a one-time verification code, with no fallback. Apple’s reviewer had no way to receive that code without installing that app first, and rejected the submission on the grounds that core functionality — logging in at all — should never depend on installing something outside the app. The specific technical remedy Apple’s rejection email suggested (embedding an in-app browser view) didn’t actually apply to my situation at all; I wasn’t opening any external link or webview, I was just relying on a delivery channel that assumed everyone had a specific app installed. A demo account with a fixed, backend-side bypass code got me past that exact rejection once — but the identical rejection came back on a later submission anyway.
At that point, rather than assume the flow itself was fundamentally non-compliant, I filed a formal appeal through App Store Connect’s Resolution Center instead of resubmitting again. The argument was specific: my flow doesn’t actually insist the user install another app to log in — the guideline’s concern is being unable to complete a core function without installing something extra, and I made the case that mine didn’t force that. Apple’s review board accepted the appeal on that basis, and the app was approved without me having to change the underlying delivery mechanism. Worth remembering: if you genuinely believe a rejection is misreading how your feature actually behaves, an appeal is a legitimate path, separate from just resubmitting — it goes to a different reviewer/board than the original review, and it’s the right tool specifically for “I think this rejection was a misapplication of the guideline,” as opposed to “I need to fix something.”
Guideline 5.1.1 — Data Collection and Storage (same App Review Guidelines page, section 5.1.1). I required full account registration before a user could see anything at all — including a plain pricing/catalog page that had nothing to do with any specific account. Apple’s actual rule is narrower than it first appears: you’re allowed to require registration for account-based actions — checkout, payment, viewing your own order history — but not for browsing content that isn’t inherently tied to an account. The fix was structural: separate “browsing” from “the account-based action that follows it,” and only prompt for login at the point where an account is actually required, rather than gating an entire screen or flow from the very first step.
Takeaway: when a rejection includes a specific suggested technical fix, verify that the suggestion actually matches your app’s architecture before implementing it — it’s often generic boilerplate attached to a broader category of violation, not a precise diagnosis. Read the guideline text describing the outcome Apple wants, and work backward from that.
How I could have avoided both, before ever submitting
Neither of these needed a reviewer to catch — both were checkable in advance, and cheaply:
- Read the guidelines before you design the flow, not after you’re rejected. Section 4.2 (Minimum Functionality) and section 5 (Legal/Privacy, which covers 5.1.1) are both short, plain-language sections. Reading them before building login and content-access flows would have flagged both issues at design time, when changing course costs a conversation instead of a rejected build and a re-review cycle.
- Specifically stress-test login and any first-run flow as if you have none of your usual assumptions — no account, no specific third-party app installed, no prior session. That’s exactly the position a reviewer is in, and it’s a very different position from the one every member of your own team is in by the time you submit, since you’ve all been logged in and testing on the same devices for weeks.
- Ask “does this screen need to know who the user is?” for every screen that currently requires login, before you ship it that way. If the honest answer is “no, I just defaulted to gating it,” that’s very likely a 5.1.1 issue waiting to surface. Reserve login prompts for the specific actions that are genuinely account-based — checkout, payment, viewing personal history — not for entire sections of the app.
- Treat any authentication or verification step that depends on a specific third-party app as a 4.2.3(i) risk by default, and design a fallback into it from the start rather than as a reaction to a rejection. If a reviewer (or a real user) can’t complete your core flow using only what ships with the OS, that’s the guideline being violated, regardless of how convenient the third-party option is for your primary user base.
- When you do get a rejection, separate “patch the reviewer’s specific path” from “actually address what the guideline is concerned about.” The first one alone didn’t hold for me — a demo account bypass got me past the rejection once, and the identical rejection came back on the very next submission. What actually resolved it was going back to the guideline text and making a real case, through a formal appeal, for why my flow didn’t violate it — which is different from just resubmitting and hoping, and different from silently reworking the feature. If you genuinely believe a rejection misreads your feature, appeal it with a specific argument; if you agree it’s a real gap, fix the underlying behavior; either way, don’t just patch the narrow path a reviewer happened to test.
A short checklist
- Register your production identifiers deliberately, under the correct team, before any build runs with automatic signing against them.
- Capabilities like push notifications typically require two separate pieces of setup (an explicit identifier registration, and a separately generated/uploaded key) — verify both independently.
- Decide your Company Name and target app name before your first submission — one is permanent, the other has to be globally unique.
- Don’t accept a payment/tax agreement you don’t actually need just because the interface suggests it — check whether it’s required for your actual business model first.
- Understand why a configuration warning is being raised before just adding whatever key Apple’s message names — sometimes the correct fix is removing an unnecessary declaration, not adding one.
- Never gate content behind login unless that content is genuinely tied to a specific user’s account.
- Treat a rejection’s suggested fix as a hypothesis, not an instruction — confirm it actually matches how your app works before implementing it, and watch for a rejection recurring after a fix that only addressed the review process rather than the underlying behavior.
- If you genuinely believe a rejection misreads how your feature behaves, use Apple’s formal appeal through App Store Connect’s Resolution Center and make a specific, guideline-text-based argument — it’s a different mechanism from resubmitting, goes to a different review, and worked for me when a resubmission alone hadn’t.